I have a problem. Seriously, my husband would agree. I HAVE to make my kids Halloween costumes. It’s a thing. And I am not a seamstress at all. I feel like I have A LOT of potential to end up on some Pinterest-fail list. But I will say, I am somewhat realistic about my abilities, or lack thereof, so I try to aim on the smaller, easier side and use “hacks” (i.e. regular clothes, just modified). Of course I also really, really, really want them to coordinate or have a theme…yep, I’m that mom…but I don’t want to “force” them to be something, I like to let them decide. So all that makes it even harder to find coordinating costumes that everyone is happy with and that I can actually execute on my own.
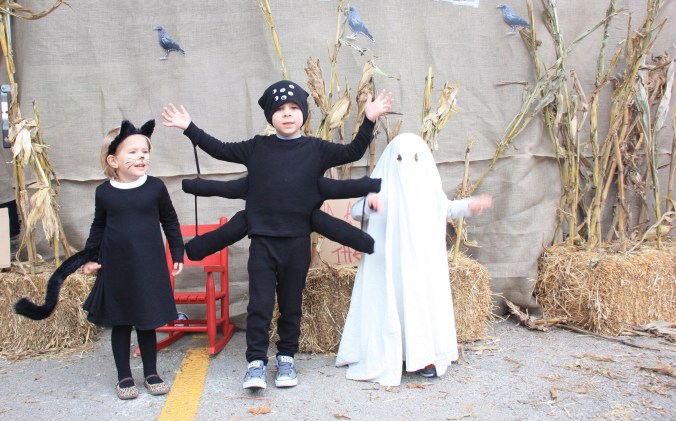
But last year was a success, if I do say so myself. Without further ado…The Ghost, The Black Cat, and the Spider!
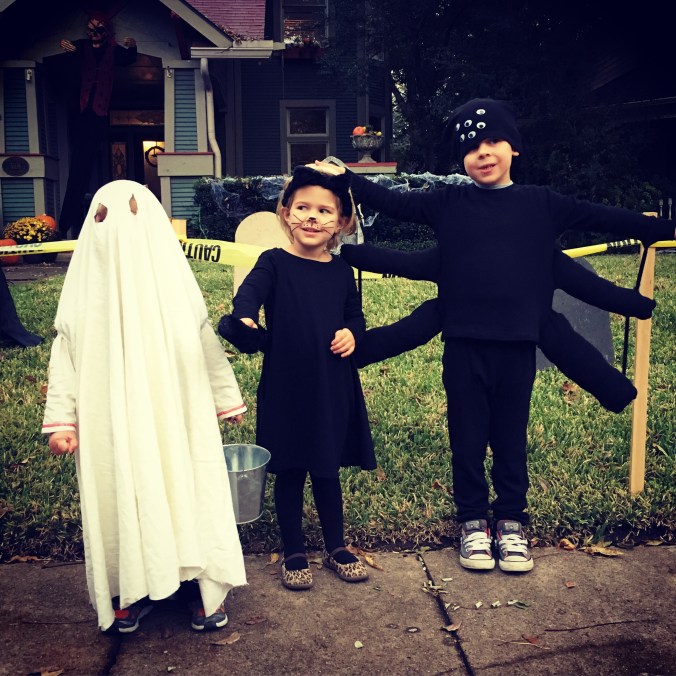
Ghost (age 2), Black Cat (age 4), and Spider (age 5)
So my oldest really wanted to be a spider so we started tossing out other typical Halloween costumes and my daughter was super excited to be a black cat. That left the littlest who of course, at age 2, picked random household objects or whatever was in his line of vision. haha! But when we suggested ghost and showed him a ghost costume, he was all over it – he’s shy in groups or with anyone new, so I think this made him feel safe. And bonus, it’s THE EASIEST COSTUME EVER!
GHOST – Yes, I did it old school. Forget making it cute. I took an old bedsheets that I happened to have, threw it over his head and cut around the bottom. I didn’t want it to drag or make him trip (or get muddy/wet) so I cut it above his shoes. Then I cut out arm holes so it would stay put (and he wouldn’t get tangled) and finally eye holes. DONE! So easy! And it’s great for any locale/temperature because you can simply adjust what they wear under it.
BLACK CAT – the easy part was that I bought black tights and a black dress. I found the dress at Old Navy and you know they always have sales! I made the tail and ears myself…
The tail was easiest…simply sew a “tube” of black fuzzy fabric, whatever length you desire, and then curse yourself for making it thin while trying to turn it right-side-out. 🙂 Then stuff with pillow stuffing (I literally bought the cheapest option!) with help from small hands.

My helper, stuffing the tail.
I then used a random piece of wire from my husband’s tool shed and stuck it down the middle…this allowed the tail to hold it’s shape and not drag. Sewed the whole thing shut and then sewed it onto a piece of black elastic cut to the size of my daughter’s waist. Why the elastic? Well, I debated just sewing the tail directly onto the dress but decided I would like to use the dress again! So I used a seam ripper to take out a small piece of the back seam in the dress, at waist height. She could then wear the tail around her waist UNDER her dress, the tail could come out the small hole, and after Halloween, I simply stitched the hole closed again and viola, a black dress she could wear every day (with cute, funky leggings of course!). 🙂
I *could* have just bought a kitty cat ear headband, but wanted to make my own. I used a plain headband, cut two pieces from a wire hanger, bent them into ear shape, and used hot glue to attach. I then sewed a little triangular “sleeve” of the fuzzy black fabric to fit over the ears and also used hot glue to attach at the bottom. Finally, I took cut a long, thin strip of the black fabric and wrapped it all around the headband, covering the plastic and securing the ears. I put a dot of hot glue every couple of centimeters and viola, soft cat ears! She still wears these on a regular basis! 🙂


Overall, the black cat costume was pretty easy, took minimal skill (straight stitching, seem ripping, hot gluing), and turned out super cute!
SPIDER – I think this is my favorite because it’s clearly homemade but super cute, comfortable, and fun! Everyone loved it! It actually took me awhile to find what I wanted as the base…plain black long underwear-type separates. I found them at Target, as a set, and bought two sets (so I had two shirts and two pants – for all those “legs”!).
I started by removing (cutting off) a set of arms and a set of legs. These I then sewed shut (the ends where the ankles and wrists would be) and filled with stuffing. The most annoying part here was ripping out the seams all along both sides of the shirt that was uncut. I then took the stuffed arms and legs and stitched them back into the seams, leaving equal space between them all. Viola, the top now had six “legs” (four stuffed, two for my son’s actual arms) plus we would have his two real legs as the other two spider legs for the grand total of eight. Whew.


One problem – the legs all just drooped. I originally debated about using wire (like for the black cat’s tail) but realized that they would get in my son’s way. So instead I just used black ribbon to attach all of the “legs” together…so when we raised his real arm, the other two below raised as well. It turned out so cute and he loved showing people his “legs”. 🙂

One last thing – I used the extra fabric from the middle of the cut/armless shirt to make a little beanie hat. Yeah, I could have bought a black hat but this was free. I then glued on large googley eyes. The spider was done and, again, didn’t require much actual skill on my part.
Overall, I really loved this theme and both the ease and cuteness of these costumes. We got lots of compliments and my kids were really thrilled. 🙂 In fact, the two pictures here are the only ones we have because we were too busy having fun…which is the whole point, right?!